Think I saw Cesar Decal Jr utilise this in his introductions to Zbrush found on his youtube pages. I think it's great to study how traditional artists use digital software as they always seem to have some really innovative techniques which may be overlooked/ completely unused by digital veterans.
This technique will automatically export shots of your model from multiple views in to Photoshop. It has other handy uses such as getting to a certain angle quickly (if you have images for reference in the background).
So here's where to find it. Under Documents (in the top panel) go down to ZApplink Properties. From there you'll see the settings below. All you need to do is set the angle you want up in Zbrush then shift-click on the button you wish to use for that view.
By default when you select a front, right or top view it will automatically go and fill out the opposite for you.
Showing posts with label zbrush. Show all posts
Tutorial: Quick character sheets in Zbrush
Lizardman colour tests
Just a quick update on the lizardman concept I was working on. If you didn't see it here was the initial paintover.
I started adding the frills / horns and tested out some legs (the legs and arms I'm going to change but I wanted to test scale).
I started a rough colour paintover after completing the frills. I wanted to try blending some colours and used some Iguanas for reference (the head was based on iguanas, it's where I got most my lizard reference from)
I really wanted to add a lot more colour to my work as usually, especially with my inspirations alot of my sculpting work stays grey or very pale, almost pastel colours. I think colour is something we avoid a great deal in 3d work, games and film together. It's something which is challenging but I think I'm going to keep at it and make a few characters that really pop out.
Below are the paint test videos, these are polypainted on top by hand, mild detailing done with one of the default zbrush alphas and a few of my own (see below for some of my own rough alphas, taken from some of my photos)
3D Project: Clothed model project part I
Very quick post showing the starts to a new project I'm working on. This is based on the current on demand workshop I bought from Zbrushworkshops. You can find the specific course here.
After a very quick play last week trying to get used to Maya again I managed to create a rough jacket and got it working in Zbrush (see below). I decided to start again from the start with a project in mind.
The project I have chosen is to do a 3d representation of Inquisitor Eisenhorn from the novels/40k universe. The reason for this is the complex clothing (in the concept art by Clint Langley he wears 3 layers of jackets!) as well as plenty of smaller items on the concept art which have their own techniques.
I've started blocking out the pieces as the workshop recommends (I'm using Maya. not Softimage but the principles in all 3D packages should be roughly the same).
As I'm not going to be using it for game art I've been doing some tests with using just flat geometry (instead of thickening/ adding geometry in Maya for the inside of each bit of clothing). Once imported in to Zbrush and subdivided provided it is all one polygroup you can use Panel loops with a thickness to create the inside/ clothing thickness.
Here is the first test using the collar piece (the head is just an old head bust I did just to test scale). Aside from the bevel which I need to change I was happy with the result.
The plan is to get this fully finished by Christmas although depends on work schedule. Next weekend I should get the boots and inner+main jacket. Then after importing will pose, then re-import in to Maya to roughly model the outer jacket.
September sculpts
Kicking in to overdrive and trying to sculpt as much as I can when I have free time. Here are a some of the sculpts done this month in my spare time;
I did this yesterday, trying to use a traditional method for creating a figure. Using a very simple armature created with zspheres then after posing using a standard sphere with dynamesh in order to sculpt over the top of the wire mesh. It was fine up until the point of adding the arms.
What I might do in future is append spheres separately for each ligament (and one for torso) then merge them after getting to a certain point as I was having some problems with the back/shoulder muscles. When it was all 1 mesh re-toplogising with dynamesh was causing that area to get even harder to fix.
I do like the posing and then sculpting asymmetrically. I think it adds a weight from the start which can be missing from the sculpture process, as well as possibly a more natural feel (not working in symmetry). I quickly concepted an orc/ogre from the base form I created which worked well.
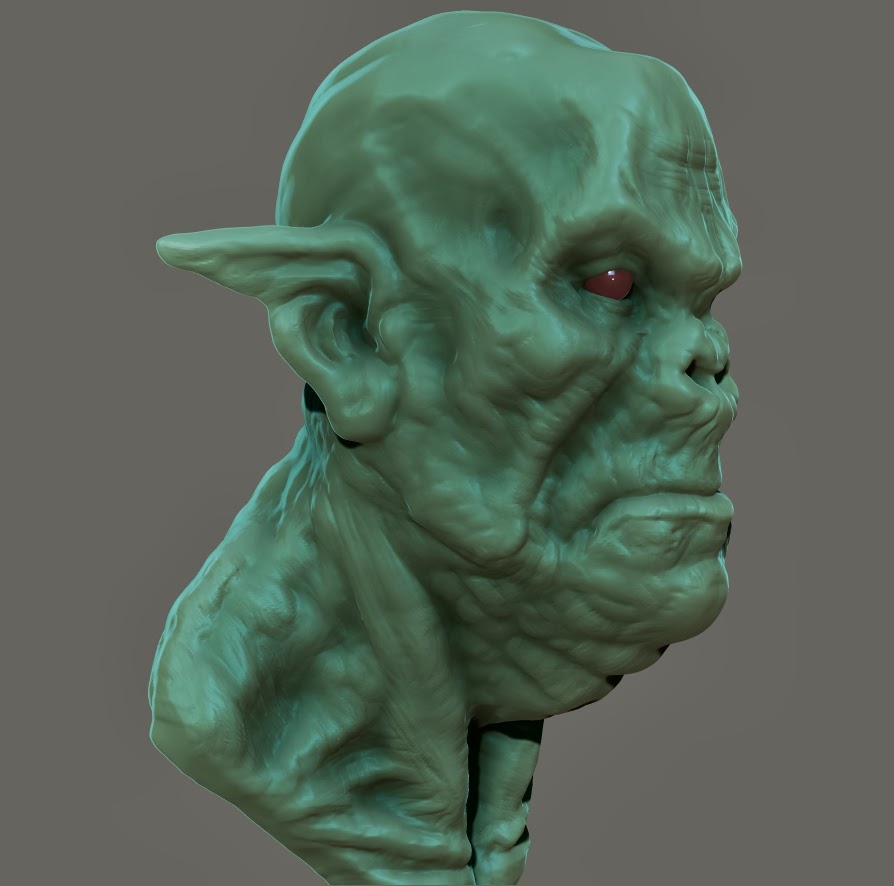
Earlier in the month I was trying to work in different styles. After watching so many effects videos and prosthetics videos (the Stan Winston school vids on youtube are awesome!) I decided to go for a prosthetic/ mask style. Zbrush could be used to concept these ideas quickly before a mask/makeup was created. Below is an orc and goblin with this in mind.
Below: Removing symmetry from the mesh and testing some ideas for the old orc.
Moving on with trying different styles I tried going for a highly stylised look. One of the weaker areas I have in zbrush (and 2d drawing) like a lot of beginners is the work can end up being a little 'soft' so tried to incorporate hard edges to help emphasis the 'thug' character.
Below: I wanted to just see how it would look like if I turned him in to the punisher/frank castle. I prefer the armoured look from punisher max and the most recent movie (the dude's not bulletproof!). This was done using extract mesh and imm curves
The alien head below was heavily based on Jordu's creature/mas work. This was a bust/head project to see if I could work a model over a number of sessions. I completed it over 3 sessions, then recorded it over 4 videos. The link is below the image (probably better to load in youtube itself to see all 4 parts).
Still a few days left in the month to try and get some more work on. I'm going back to Casey Love's SWS digital to practical lesson and trying some 2d concepting to try and increase my skills in building character and story within a character.
Working in Clay and other things
This week I've done a bit of everything. Drawing in photoshop, sculpting in Zbrush and working in Super Sculpey polymer clay.
Clay: I spent about 3-4 hours on this guy so far. It's my second go with super sculpey and it's great fun! For the eyes I used cheap pearl beads from a craft shop. I am still working on the shape the aluminium gives me underneath when I build the armature.
Photoshop/2D: These were both done in photoshop. I added a filter using snapseed on the ipad for the demon.
Above: 'High Demon' based on the sculpture by the Shiflett Brothers (minus the wings!)
Below: Still going through Casey Love's design and sculpting video on Stan Winston school. It's improving my concepting a lot and I'm enjoying just sketching in Photoshop now.
Finally this wasn't done this week but I completely forgot to upload it on here. This is a torso based on Scott Eaton's anatomy course. It's a course I'm really interested in taking in the future so wanted to see if I could get to some level of anatomical understanding before.
The timelapse of it can be seen here;
A week of monsters: Kaiju Crunches
I did these in the lead up week to Pacific Rim (after watching it I can't recommend it enough, go see it!). They were all done within about an hour and a half. I even tried some 2d monster sketches in photoshop (I haven't done 2d stuff for literally years!). It was great fun and will do a few more themes like this in future:
Tools used: Zbrush+Photoshop - Wacom Intous 3
Above: This was the first one. Like an evil dinosaur-tortoise head. I tried basing the first 3 kaiju on animals loosely.
Below: This one is kind of a rat-shark. I didn't really know where to go with this one but wanted something with huge teeth! The timelapse and turntable is also below
Above: A bird based one. Wanted to make a beak. This ended up looking like a smaller monster due to the humanoid proportions. The making of is below (minus the beak as they are separate subtools). The video shows more of a dinosaur looking base for the model (kind of looks cooler now I look at it without the beak)
Below: This was the last of the Zbrush sculpts. This was the only one done pretty much directly after watching the movie. I tried going for the smaller eyes closer together and the huge jaw. The parts aren't fully defined and I think the over the nose jaw gives it a bit more comic/cartoony look.
Below are 2 sketches done in photoshop, still under an hour. These were done while going through one of the Stan Winston school courses based on digital to practical design. Explaining very basic and simple techniques just to get some characters roughed out for sculpting in clay.
You can check the full course here. I can't recommend those courses enough
I hope these are enough to get others doing some monster drawing/sculpting, go watch Pacific Rim if you haven't already! Next post I'll review some of the books I got in a recent art book haul!
June Sculpt Sketches/Crunches
Sorry for not updating. Been away and very busy at work. That hasn't stopped me sculpting though! Here are a few done over the past month or so;
Above: An attempt at a more animated/ hard surface stylised creature. Wanted to get some hard edges in there for the nose.
Above: Tried working off a concept image but it failed. Just started sticking objects on the side of him as he was meant to be a future/cyborg style character
Below: Refined the eye a little. I'm starting to see common errors in my anatomical work, namely making the cheekbones/cheeks too pronounced and pushing the eye too far back in to the socket. 30 mins reworking and I was a little happier with this.
Zbrush: Recent sculpts/ crunches
Ok This is a bit of an image dump post but these are Zbrush sketches/crunches done in the past month. Some I carried on to paint and such but nothing ott. Most stuff done within 2 hours.
First up was my version of Martian Manhunter from DC. This was done in about an hour, I just wanted to try out some comic bust ideas and how to work with curves to create new geometry for the collar.
Below: I was taking a lot of reference from some old native American photos from the late 1800/early 1900s and gave sculpting one a go. I took ages trying to work out how to do hair but it still didn't work well but I'm happy with the face. Took symmetry off very early for this one which I enjoy doing.
Above and below: This was a portrait attempt using Ray Stevenson (Rome/Punisher Warzone) for reference. I really wanted to do a Punisher bust so I think he has a great face for it (regardless of what people think of the films). Took symmetry off pretty early in this one as well (hence the image below's angle, I hadn't actually started on his right ear!)
Below: 45 min sculpt of some finned warrior style dude. The fins were actually using the IMM goblin set (They were originally goblin feet!)
Below is probably one of my favourite ones. This was from a cylinder after checking some speedsculpts on youtube. About 45mins-1hr but happy with the result. I wanted to show the process off for this but it deleted my history when I split the eyes in to a new object using split groups (Will learn that for future reference!)
I'm currently trying to work on some ideas I can do quickly for characterised/animated style full characters, something similar to simple collectible vinyl toys just for a test (and to get me to try doing a full model!)
Zbrush: Armature tests
I've been doing some studying on Zbrushworkshops.com - One of the free lessons explains the many ways in which you can start your sculpt. I wanted something which was similar to clay sculpting so tried the Armature/wire maquette style which utilises Zspheres. Rather than getting the main form from the spheres you instead keep them at minimum width and treat them as a wire base for the basic curves/shapes (much like a wire armature in clay). I used a basic dynamic pose here to see how it worked within the program.
From there you can then start adding spheres with dynamesh (and insert basic shapes) to block out the main form, as if you were sticking the clay on the wire. It allows you to sculpt in pose which I like personally (as I want to eventually work on maquettes/statues for personal work).
A Couple of pros and cons for this technique:
Pros:
- You have the potential of getting extremely dynamic/organic sculpts from using this
- Traditional sculptors I see this as the most natural way to get in to digital sculpting
- The model will look more natural if sculpting in pose rather than doing that after, this technique forces you to not work symmetrical.
- This technique is no good for game characters or animation, riggers would have a nightmare!
- As I worked out (as I didn't really follow it exact) you have to get your proportions correct with this then keep to them (once the zspheres are moved to correct lengths use ctrl while moving to ensure they don't stretch. This is important for all sculpting but you can quickly mess up as in pose.
- Can be harder to fix errors. Due to the non symmetrical nature of the sculpt mirror and welding will not work.
- It can take longer than a regular static pose - working with no symmetry and likely using in dynamic poses, constantly checking shape can take longer. Also working out how anatomy moves at certain angles really takes a precedence!
Oops need to work on legs sometime!