Showing posts with label 2d. Show all posts

Quick Paints/portraits in Photoshop

No Comments »

I had the weekend free to do some sculpting but ended up getting not far with it. Sometimes clay or Zbrush doesn't want to play. I didn't want to waste the complete weekend though so tried my hand at some quick concepts/ portraits.

2D/painting is not my forte but I've grown further understanding in it based on my own inspirations. Traditional skills are very important so always good to practice them even if it's not your particular strong suit.


Above: after watching an incredible video based on Dune concept art creation I was inspired to make my own 'industrial planet' concept design. High in the smoggy clouds overlooking a neighbouring moon. 45 min doodle and ended up using part of 1 of my photos for the moon in the background. The emphasis was on blending colours and providing some depth in the composition.


Above: Monk: tried to be subtle with this one on the colouring/shading. Using photos as reference on the other screen just for lighting the face. I'm happy with this but liquify saved me a number of times!

Below: Noir: Tried a different style as I wanted the contrasting tones from the rim and shadows to shine through. It didn't work great due to out of practice scaling/sketching but for the bold style I just worked with a duplicated later which I then cut out, overlaying the painted layer on top for a stylised look.


Overall I'm happy with these, each one not taking too long (all under 1hr each, the industrial concept being under 45 mins!). Each of these I tried to make an emphasis to try something new but add colour balance and blending along the way. Liquify is a great tool if you're not too comfortable/not that well practised in drawing facial proportions and I think over I'll need to use it less and less.

Concepting and Spitpaint

No Comments »

Got interested recently in a FB group called Spitpaint. Similar to lunchcrunch it gives a rough topic to choose from then you have 30 minutes to create an image from scratch (no photos/phototextures allowed).

Thought I'd brave it, it is incredibly challenging, particularly as I don't put too much time in to painting. I think it's very important though as it helps immensely with colour blending and image composition. For saying my most knowledgeable area is photography I tend to find colour tone and composition my weakest area in painting/sculpting.

Here are my first few goes at it anyway;


Above: No particular theme for this one. I was just trying out new brushes in PS. Kind of imagined a rocky canyon/shipwreck. This one took about an hour after getting new brushes recommended by a friend (they are Peleng's brushes, made available on his blog).

Below: This was the first entry I put in to the spitpaint group. Taking about 27 minutes. The theme was 'tunnel entrance' although ended up making it more like the exit!


Above: just some very rough landscape thumbnails. 1hr in total for all 4 trying to work with brushes and composition
Right: very rough portrait, topic 'Apache' 25 mins. Very tricky to do portraits (for me anyway) in 30 minutes.


By doing this it also improves my sculpting workflow for concepting. Here is a quick sculpt knocked together and then a rough colour/texture test taking roughly 1 hr;


I'm making progress on my clothing modelling, slowly chipping away at the model side. I've also started re-learning some vfx, this time for use in realtime engines. The tutorials are from the great ImbueFX. Bill Kladis is an excellent teacher for UDK/Unreal engine particle effects and has worked on titles like Mortal Kombat and Injustice: Gods Among Us. I'll try and get some stills up in my next post as my current rig probably isn't great for capturing realtime effects!

Working in Clay and other things

No Comments »

This week I've done a bit of everything. Drawing in photoshop, sculpting in Zbrush and working in Super Sculpey polymer clay.


 Clay: I spent about 3-4 hours on this guy so far. It's my second go with super sculpey and it's great fun! For the eyes I used cheap pearl beads from a craft shop. I am still working on the shape the aluminium gives me underneath when I build the armature.


 Photoshop/2D: These were both done in photoshop.  I added a filter using snapseed on the ipad for the demon.


Above: 'High Demon' based on the sculpture by the Shiflett Brothers (minus the wings!)
Below: Still going through Casey Love's design and sculpting video on Stan Winston school. It's improving my concepting a lot and I'm enjoying just sketching in Photoshop now. 


Zbrush: A Sculpt based on Paul Bonner's Orcs. I intend to take this through to be a complete character. Having a few problems with the armour at the moment as trying to just make it all in Zbrush but may move over to maya just to get some base geometry to work from.


Finally this wasn't done this week but I completely forgot to upload it on here. This is a torso based on Scott Eaton's anatomy course. It's a course I'm really interested in taking in the future so wanted to see if I could get to some level of anatomical understanding before.


The timelapse of it can be seen here;

A week of monsters: Kaiju Crunches

1 Comment »

I did these in the lead up week to Pacific Rim (after watching it I can't recommend it enough, go see it!). They were all done within about an hour and a half. I even tried some 2d monster sketches in photoshop (I haven't done 2d stuff for literally years!). It was great fun and will do a few more themes like this in future:

Tools used: Zbrush+Photoshop - Wacom Intous 3


Above: This was the first one. Like an evil dinosaur-tortoise head. I tried basing the first 3 kaiju on animals loosely.

Below: This one is kind of a rat-shark. I didn't really know where to go with this one but wanted something with huge teeth! The timelapse and turntable is also below


Above: A bird based one. Wanted to make a beak. This ended up looking like a smaller monster due to the humanoid proportions. The making of is below (minus the beak as they are separate subtools). The video shows more of a dinosaur looking base for the model (kind of looks cooler now I look at it without the beak)


Below: This was the last of the Zbrush sculpts. This was the only one done pretty much directly after watching the movie. I tried going for the smaller eyes closer together and the huge jaw. The parts aren't fully defined and I think the over the nose jaw gives it a bit more comic/cartoony look.


Below are 2 sketches done in photoshop, still under an hour. These were done while going through one of the Stan Winston school courses based on digital to practical design. Explaining very basic and simple techniques just to get some characters roughed out for sculpting in clay.

You can check the full course here. I can't recommend those courses enough


I hope these are enough to get others doing some monster drawing/sculpting, go watch Pacific Rim if you haven't already! Next post I'll review some of the books I got in a recent art book haul!

Old man portrait WIP

No Comments »

Some more painting in Artrage. This is still WIP but I'm happy with it so far. Just darkened it a bit in an online editing program (Picnik) - I usually paint with mid range grays then add a little more contrast after, hopefully after more confidence with my drawing/painting skills I'll be able to apply it directly to work during production.

Artrage Studio Pro

No Comments »

My girlfriend recently bought me Artrage . Great and affordable art package based around emulating traditional brushes/pens. I'm having lots of fun with it so far. It's simpler to use than photoshop if doing straight artwork so my plan is to use it in a general workflow, doing the main design, shading, colouring in artrage then taking over to PS to add any more final touches (textures, level adjustment etc).

Here's a sketch anyway done in Artrage. (first quick sketch but I'm happy enough with it!)

Edit: Just tweaked a in PS for a little more contrast and gave it a subtle tone. (see below)

Zombie Concept

No Comments »

Just been trying Autodesk Sketchbook here's a quick zombie sketch/concept with it, put a few textures in via PS. It seems like a good tool for fast concept work. It's also great fun for just doodling, very simple interface but great for tablets.

Sketchbook Work

No Comments »

Here are some of the sketches from my sketchbook. I've just cropped some of them and put them on 1 big page. Varying styles. A lot of it is just character work / study but some doodles are related to my 3D work (such as the street/ market scenes).


Below is a quick painting I did of the Goblin (top right in the sketchdump). I've always found Orc/Goblin skin tones a bit easier to build up, I think mainly because when I first started painting models they were the first I gave a go and simple Highlighting techniques worked. Ugly characters are easier to draw/paint as well! You get a little more leeway. The next one I'm going to try is the girl with the Goggles (steampunk esque). Anyway enjoy!


PS for those that haven't had a look head on over to the new Digital Tutors site. Now all of their tutorials are online and ready to learn with a monthly subscription. I think it's an excellent idea and as soon as I get payment sorted I'll be signing up for 6 months straight away!

New Sketchbook

No Comments »

As mentioned yesterday I bought a new sketchbook! Here are some doodles from the first page.


I'm using a Conté white pencil/crayon just to add some highlights to things (I wanted an organic sketchbook as opposed to a plain white one to test some lighting / highlighting later on as I'm going to be designing my 3D projects in here).

Just before I go off to get food and similar here's a quick painting of the batman sketch. Photographed, uploaded and painted on with the mouse not the Wacom (really quick 5 minute job just to see what it looked like coloured in).


More doodles

No Comments »

Here are more sketches I did in the past few days. This week I've also bought myself a sketch pad for the upcoming Drink and Draw in Cork (hopefully a regular thing) with a Daler-Rowney graphic pencil set.

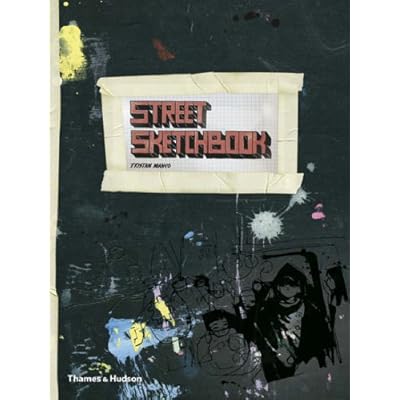
Today I also bought This:


Street Sketchbook

by Tristan Manco

It's a great book packed with sketches and work from a lot of street artists (although I wouldn't call it Graph art more like modern graphic design).


I'm going to try and work on more cartoon/simplified characters this week and some full body sketches and try a bit more lighting skin tones when painting digitally.


Above: More work on lighting, starting from an orange/peach to navy/purple gradient.
Below: Sketching Judge Dredd. I went for an older style Judge (Mike McMahon possibly?). I think I still prefer just the standard black and white one here. Took a photo of my sketch and went over it on the Wacom. Thankfully my new sketchbook isn't lined!


Wacom Painting Tests

1 Comment »

Here are a few sketches/paintings I've done with the Wacom in the past few days. I still need to work on proportions a lot but I'm trying to get a feel more for the lighting and colouring currently.


Above: No reference. The proportions are a little off but I'm please with the lighting and colouring overall.
Below: Captain America. Needs some work on the neck / shoulder muscles. I've added the shading for the feathers which sit above his ears but not drawn them in yet.


I should be going to the coast again tomorrow to try some more landscape photography as well as get a little more use out of my 50mm and shooting some portraits.